January 14, 2020
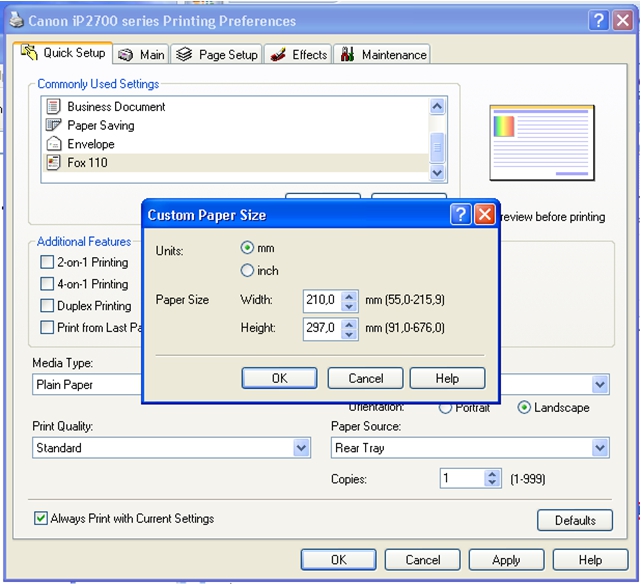
4. Pilih Pengaturan Custom
5. Atur Lebar (Width) dan Tinggi (Height) kertas, sesuai label stiker yang ingin digunakan
6. Ukuran Width dan Height dapat dilihat pada tabel berikut:
Kode
Kategori
Lebar (Width)
Tinggi (Height)
103
Barcode
201 mm
150 mm
102
QR Code
102 mm
165 mm
106
190 mm
110
214 mm
105
210 mm
50 x 20 mm
106 mm
23 mm
50 x 25 mm
28 mm
7. Pilih Ok
8. Atur settingan Print Quality jadi Standard
9. Centang Always Print with current Settings
10. Pilih Tombol Save di settingan Commonly Used Setting
11. Masukan Nama Label yang akan digunakan
12. Centang pengaturan sebagai berikut :
13. Pilih Tombol Ok
14. Pada Printing Preferences pilih Tombol Apply
15. Pilih Tombol Ok
16. Letakkan Label dengan posisi Landscape (tidur) pada printer
17. Label siap dicetak
Copyright PT. Rapupa Guna Teknologi 2019